Before wearing your new Star Mesh Body remove all other mesh body parts that you may be wearing. It’s generally best to start fresh. Right click to add the 3.85 HUD Installer.
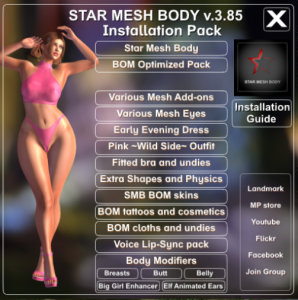
Click Star Mesh Body button on the installation HUD, This will give a folder named “StarMeshBodyv3.85”, This folder contains the the HUD and the star mesh body with default shapes. This is going to be the Main folder.
You may choose to unpack all of the folders at once or one at a time. It’s your choice but the primary items you will need are in under the first button.
To begin, right click and add.
- “[HUD]SMB_3.85_MainHUD”
- “[BODY] SB_Layered_3.85”
- “[HEAD]Star PRO_3.85 HD” or choose the
“[HEAD]Star Baby_3.85 HD”” - “[HAND&FEET] SB_Layered_3.85_Default”
- “[EYES] SB_3.85”.
- Wear the Alpha “SB_Alpha_FullBodyHide” to hide the system body unless you are using BOM.
- Also find out more from our Youtube Video to better understand which body you will need to wear & how onion layers, alphas, UVs & BOM (bakes on mesh) work.
This should get you started. You may also choose to add the other included files such as the brow shaper “[BROWS] SB_EyeBrows_Default_Shape”, body shapes or physics. The brow shaper adds further definition to your brow shape which can enhance your overall appearance. It’s not required, however. There are two default body shapes included in this folder that you may choose to use to give your body a beautiful shape that is configured to work with this body. The two default Physics items will give your Star Mesh Body fluid movement and allow your breasts and bottom to move more realistically.
Also included is a lightweight HUD “HUD]SMB_3.85_MiniHUD” that you may use ongoing that requires less system resources and will cause less lag. To begin setup, we recommend using the MainHUD first as it contains all the features you will need to configure your Star Mesh Body.
Click on the BOM Optimized Pack. This will give a folder named “SMB_BOM Optimized Body”. This folder contains the BOM optimized body. All the Star body types support BOM but these don’t have layers (onion layers). Drag and drop this folder into the main Star Mesh Body folder in your inventory. This will keep your inventory clean and tidy. Do the same on all the subsequent folders installed from Star Mesh Body Installation HUD.
Click and install Various Mesh Add-ons and it will give a folder named “SMB_Additional Meshes 3.85”. This folder contains many useful add-ons for Star Mesh Body like Vampire fangs, pubic hairs, type-M hands and feet which allows wearing Maitreya compatible foot-wear. BOM mesh nipples, heads without ears to facilitate wearing custom 3rd party ears, hands and feet adapters for wearing custom hands and feet. Plus a pack for rigged underwear and cloth layers for use with custom texture and used as cloths. Conform Add-on has been added which enables you to wear most Maitreya compatible outfits with Star Mesh Body.
This folder contains many additional rigged eye options that give you further options the way you wear your eyes. It also contains a set of non-rigged eyes which can be edited and moved, rotated and scaled as wanted. The rigged eyes cannot be moved or resized hence unrigged eyes can be useful in such scenarios.
How to Use These Eyes:
We have provided four types of eyes.
- Solid type:
These are eyes have the Iris of the eyes popping out, These eyes are best for bakes on mesh eyes. - Cavity type:
These eyes have the Iris curving inside more naturally and the cornea over the Iris. These are the default eyes for star body. - Forward type:
These eyes are essentially same as cavity eyes but they have been moved forward a little bit. so the shapes with puffy eyelids work great with this type of eyes. - Unrigged eyes:
These eyes are unrigged and they can be moved rotated as the user wants.
Cross eyes values :
All of eyes mentioned above have a cross eye value. The lower value tends to produce more cross eyed effect and as it progress to positive number the effect reduces.
You can also watch our Youtube Video for more information on setting up your eyes.
Early Evening Dress, Wild side and bra and undies are gift outfits included in the pack. Click each button to unpack these clothing items into your inventory.
Extra Shapes and physics contains many different shapes and physics layers as well as some additional brow shapers. You will also find 5 style cards that you may use to help you find additional pieces to complete your look.
SMB BOM Skins contains 10 skins tones to be used in bakes on mesh mode. This file will show up in your inventory as “SMB_BOM EVOX skins and tattoos v3.85”.
BOM tattoo and cosmetics contains many system eyes, eyebrows, lipsticks, eyeliners, hairbases, etc to be use in bakes on mesh mode.
BOM cloths and undies contains bakes on mesh layers for a top, jeans and underwear.
To enable the lip-sync on Star Mesh Body simple enable all the gestures and that will activate the voice lip-sync and when ever you speak on your microphone the lips of the star mesh body will move accordingly.
Disabling the all the gestures in this folder will de-active the voice lip-sync.
Last to install are the Body modifiers also known as enhancers or deformers. There are three body modifiers, different types of breasts, butt and belly. Plus there is a big girl combo modifiers which goes with shape as well. Elf ears have different Elven ear shapes which have animations as well. Care must be taken that two modifiers of the same type should not be worn together. Different types can be worn together. For example, don’t wear two belly modifiers together, however you can wear one belly , butt and breast together.
- Change skins: go to setup tab in the HUD and choose the skins.
- Change color of any layer: Go to Color tab on the HUD and select the layer from the list, go to diffuse and setup the color and hit apply in the diffuse color panel.
- Layer Glitches: If there are problems in skin or alpha glitching then got Color tab and click “Fix all layers”.
- Enabling appliers cloths: Go to Alpha Cut tab on the HUD, and use the quick alpha column for enabling or disabling layers.
When the mesh body is shipped it is using appliers mode and is not using bakes on mesh. Following is the simple procedure to enable bakes on mesh on Star Mesh Body.
- Disable Alphas: Please make sure you are not wearing any Alpha layer for example “[ALPHA] SB_FullBodyHide” or any other Alpha layers. if you are not wearing any alpha layers then your system body will be showing as well as Star Mesh body.
- BOM: Now on the HUD in the setup tab, click “Enable Bakes On Mesh” button, and Star Mesh body will start using Bakes on Mesh and your system skin will be rendering on the Star Mesh Body. Now you can wear any system skin, tattoos or cloths. There are several skins available with the package as well. unpacking “BOM skins and tattoos” will give you all the skin of the starbody with tattoo and makeup.
- Eyes: All is well but the eyes are still using system eyes so you can enable the Bakes on Mesh Eyes too, or if you don’t want to use these eyes then , please wear “[ALPHA] SB_EyesHideOnly(for BOM))” alpha layer to hide the system eyes and the StarMeshBody eyes will show up or you can wear any other color Mesh eyes.
- Single Layer: There is a single layer Body and hand is provided as well. These do not have the tattoo, underwear or cloth layers and greatly reduce the impact of your mesh body on the system and the sim.
(PS. when using bakes on mesh cloths , you can hide the genital from the Poses tab on the Hud
So now that your Star Mesh Body has been setup, you will probably want to start customizing it and adjusting the settings to make it your own. The hud is a pretty intuitive and complex system but it makes the possibilities of what you can do with your Star Mesh Body pretty endless. To read more about how to setup and use your hud, GO HERE.
Troubleshooting: We recommend watching this Youtube Video to help you with wearing the Star Mesh Body and comment generic mesh body issues. This video will help explain why your body parts might turn red, why your face might look broken or why your ears might turn grey.
